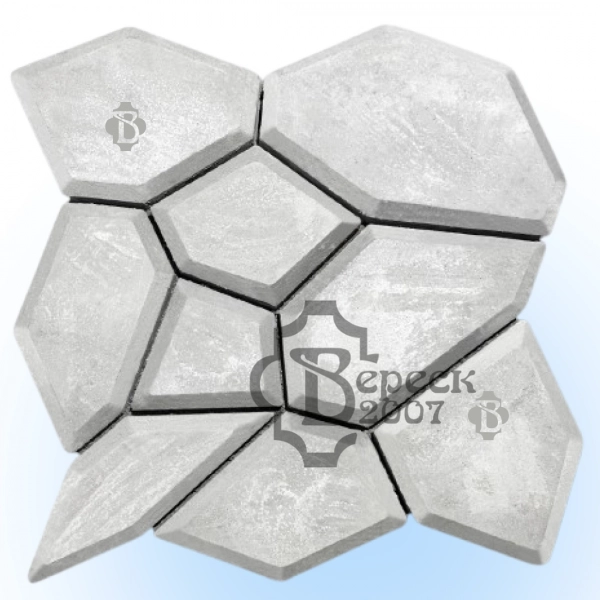
Mould for Garden path of 600×600×50 mm, 2 pieces, Veresk-2007

Article: 1080402

Size: 600×600×50 mm

Number of refill cycles: 500 cycles

+
pcs =
10.27 $
In stock

Preparation of the basis of the future Garden Path

It is necessary to make a high-quality basis for the Garden Path so it would serve for a long time. Firstly, It is required to remove the top layer of soil, which is estimated about 15 cm depth. Afterwards, it is supposed to be filled in with 10cm with crushed stones and 5cm of sand.

Basic preparation to make your own Garden Pathway

In order to create a garden path, you need to prepare concrete. It is made from cement, sand, in a ratio of 1:3, and a plasticizer. The plasticizer is added according to the manufacturer's recipe. The grade of cement should not be lower than M400. During the preparation of the grout, water is added gradually along with the plasticizer. It should come out in consistency not too thick, but also such that it does not spread like water. If significant loads are planned for the future garden path, polypropylene fiber or crushed stone fraction 5-20 can be additionally added to the grout for reinforcement. According to DSTU B V.2.7-145:2008 about unreinforced concrete pavement products. Technical conditions DSTU B V.2.6-2:2009 Structures of buildings and structures. Concrete and reinforced concrete products. General technical conditions.


Making a garden path with the help of a mould with your own hands

The execution of work on the manufacture of a garden path on a prepared basis using a special mould is made in the following sequence

1. It is necessary to moisten the previously prepared pillow on which the paving slabs are laid
2. It is recommended to apply lubricant to the molud - this will facilitate removal and also prevent the grout from sticking
3. Set the mould on a moistened place, fill it with a grout, distributing it evenly over all volume.
4. Level the grout laid out in cells on top with a spatula. For this, you can use any other object, the main aim to spread it even and flat on the top of the mould
5. The mould filled with the grout is kept for 25-30 minutes, then carefully removed and placed next to it, repeating the whole process again

  • Size 600×600×50 mm
  • Material plastic
  • Manufacturer Veresk-2007
  • Producing country Ukraine
No comments yet
Write a comment
Do you need advice?
x